Notes
Here it is possible to enter notes about the patient, if this feature is active in your organisation. The administrator in your organisation may have deactivated this feature if notes are maintained in another journal system.
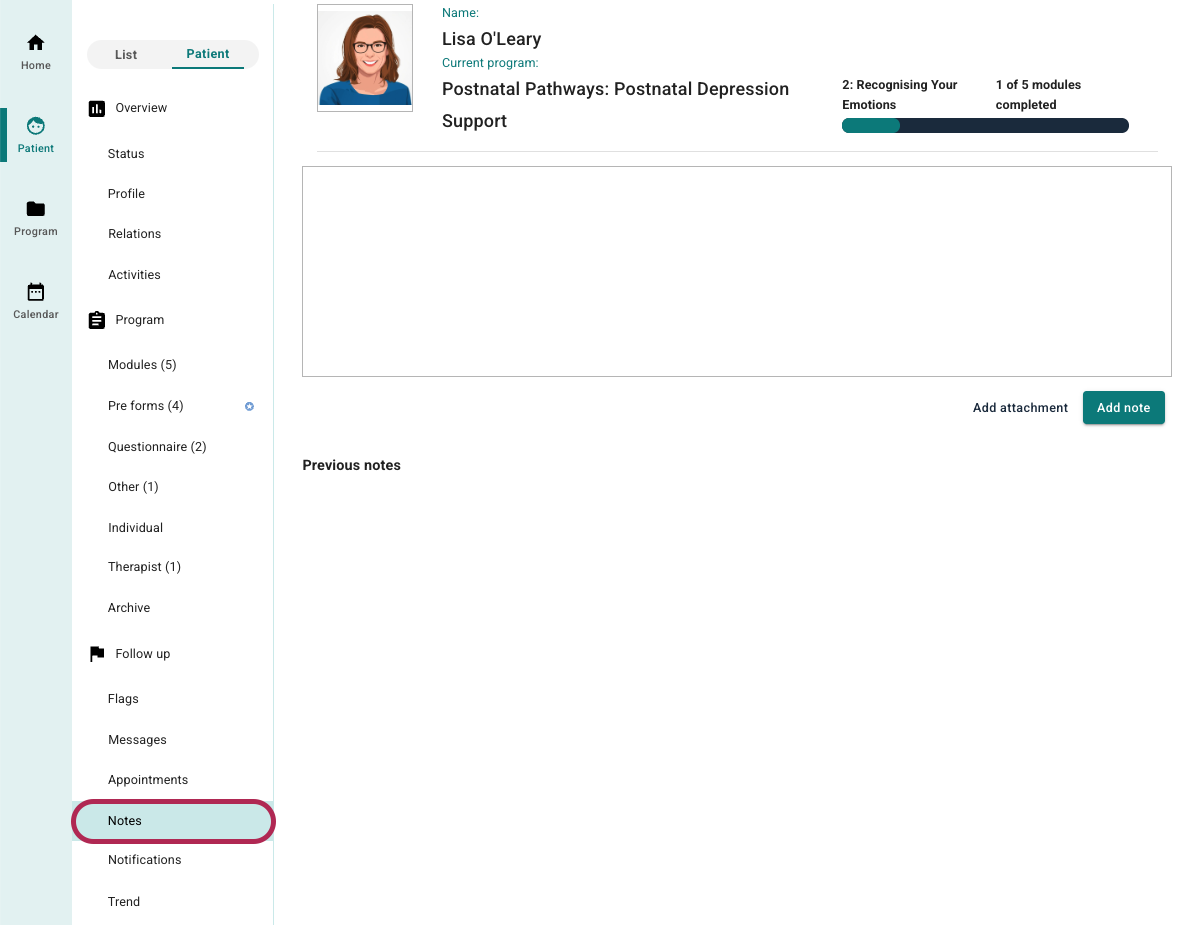
You may enter notes in the text field at the top and then use Add note. All notes are shown on this page under Previous notes. It is also possible to attach a file under Add attachment, but it is not possible to attach a file without a note.
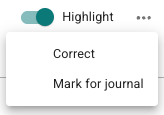
To edit or delete a note there is a menu with three dots to the right of the note, and then a choice for correction. Here it is possible to enter a Reason for correction and choose between Delete or Correction. With Correction it is possible to edit the text in the note and add attachments, and then send correction.
It is also possible to use the toggle button beside Highlight for the note to be shown as a separate tile on the Status page for the patient:

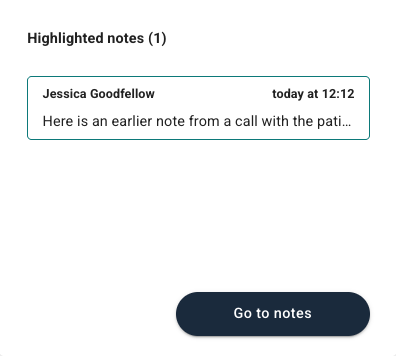
If the Journal feature is in use and you wish to mark a note as journal-worthy for inclusion in the PDF summary, there is a choice via the menu with three dots beside the note to mark as journal-worthy. A document icon is then shown to indicate that it is marked as journal-worthy.
Notifications
The patient can receive alerts and reminders via SMS and email, and the default settings for this are configured at the organisation level or on the program profile. If the patient application is designed as a separate app (native app) it is also possible for the patient to receive push notifications.
Under Notifications all reminders that have been sent to the patient, and their status, are shown. You will find a chronological list with a timestamp for when the alert was sent, and the type of alert. It is also indicated whether the alert was sent as email and/or as text message.

In the example here Lisa has received an alert by email about an upcoming appointment. Other alert categories that can be shown include e.g. Appointment reminder, New appointment, Message, New content alert and Welcome message.
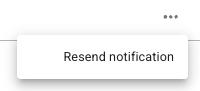
If an alert has failed then the reason for this is shown. In the menu beneath three dots beside the notification there is a choice to try to send it out again.
Customising settings for the patient
In the panel to the right it is possible to customise the settings for the specific patient.
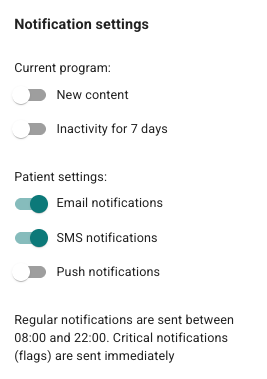
You can use the toggle beside each rule to activate or deactivate. New content means that the patient can receive an alert when there is new content or elements available for them, and Inactivity for 7 days is a reminder about use of the platform when the patient has not been active there for a week.
In addition it is possible to customise whether the patient receives alerts by email, as push notifications (if connected to a Youwell app) and/or SMS.
You can also see the time period that has been configured as standard for the organisation. If adjustments at the program-level are desired, it is possible to see documentation for Notifications and activity & Scheduled Messages. For adjustments to the whole organisation it is worth looking at the Organisational settings.
Was this article helpful?
That’s Great!
Thank you for your feedback
Sorry! We couldn't be helpful
Thank you for your feedback
Feedback sent
We appreciate your effort and will try to fix the article