An appointment is a single planned activity that you can share with one patient or a group. Appointments are created directly from the calendar view, either via the Calendar section in the main menu, or the Calendar tab on a patient profile.
CONTENTS
- Creating appointments from the Calendar view
- Fields in the appointment form
- Consent for the appointment
- Saving the appointment
- Creating appointments from the Calendar view
- Editing an appointment
Creating appointments from the Calendar view
If you have not already done so, use the + Add calendar button to add patients, patient groups and any other relevant resources to your calendar view. By having these activated in your view, you can see when there are available slots for all parties. From here, you can select a time slot in the calendar view to add the appointment to all selected resources.
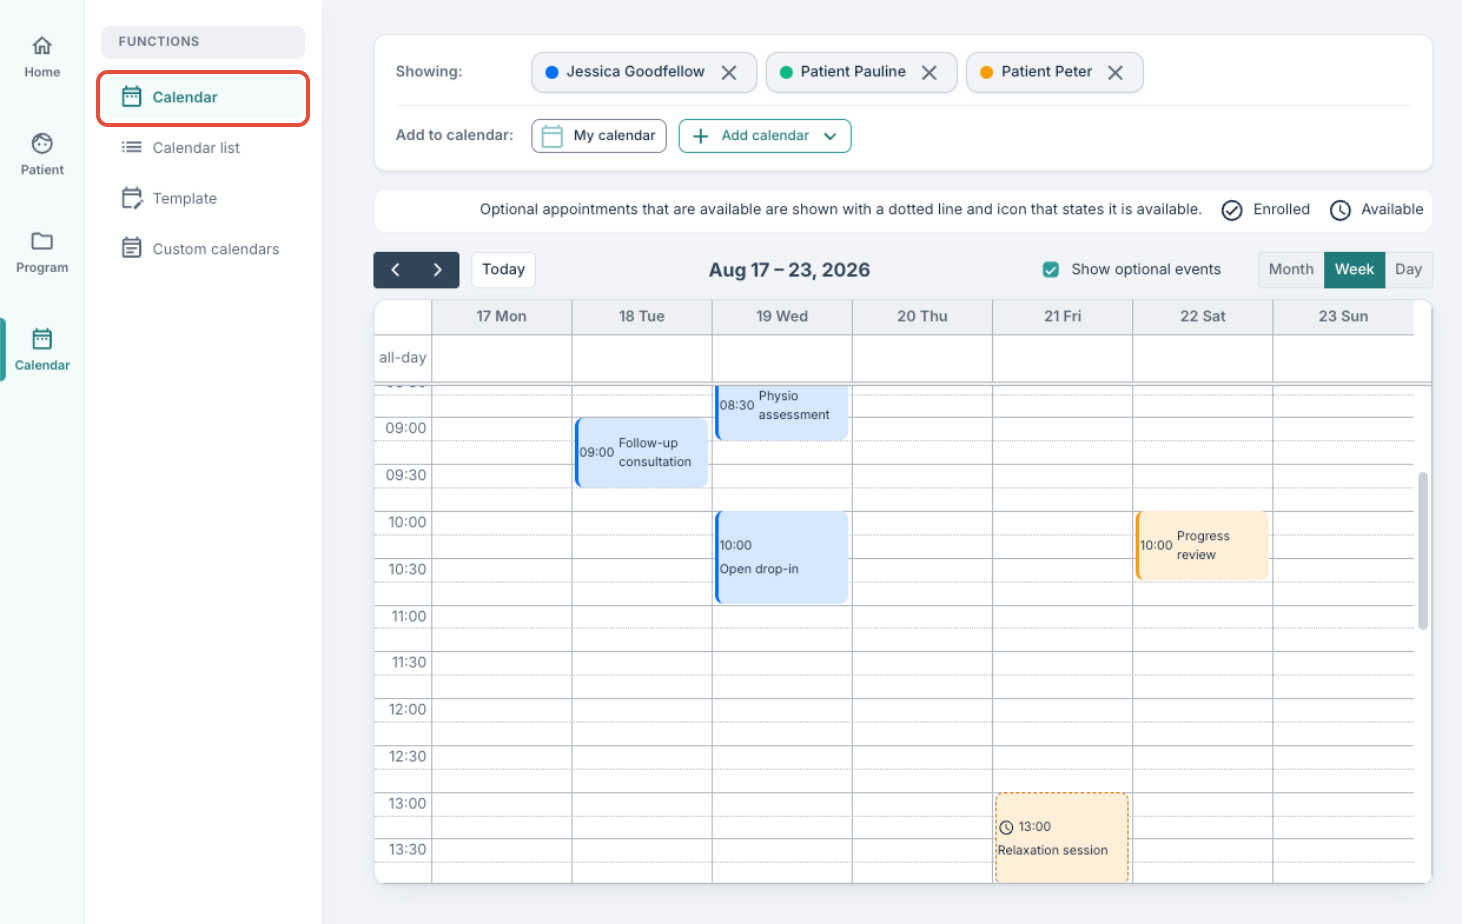
In this example, you can see that Jessica, Pauline and Pater's calendars are selected. Adding an appointment in the view below will therefore by default add the appointment to the calendars of all three.
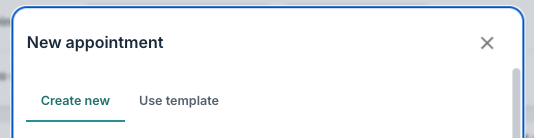
After selecting a time slot, the New appointment dialog opens with the date and start time pre-filled. Two tabs are available at the top:
- Create new — enter a single appointment from scratch. This is the default.
- Use template — apply an existing appointment template (see Create and use an appointment template).
Fields in the appointment form
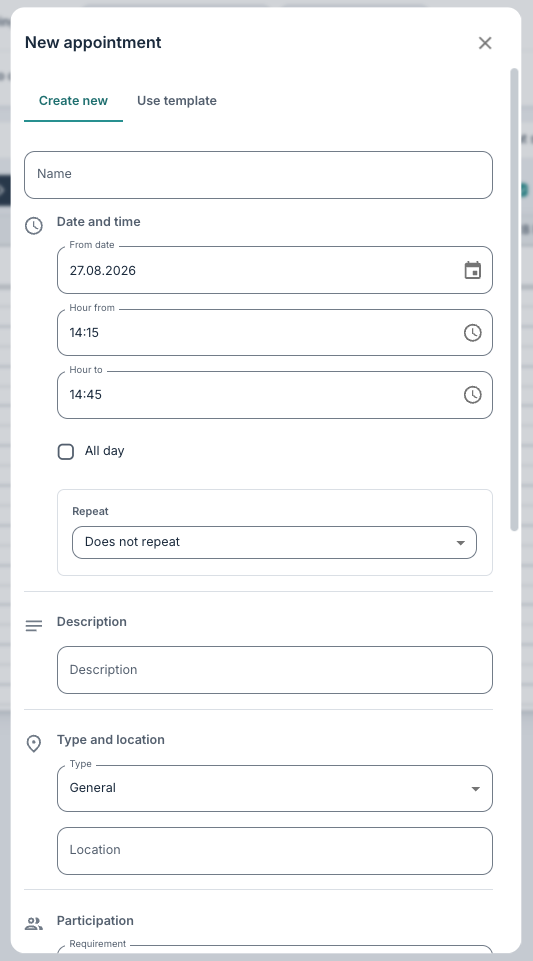
- Name — a descriptive title, visible to the patient in the app.
- Date, From and To — the date and time range. Select All day for a full-day appointment. The duration you set is the duration shown in the calendar view.
- Repeat — whether the appointment repeats (see Recurring appointments).
- Description — free text shown to the patient in the appointment detail.
- Type — General or Attendance may be selected for a physical meeting, or Video for a digital meeting. Phone call can be selected if it is a phone appointment.
- Location — the physical location. Shown and required for Attendance appointments only.
- Provider — the video provider. Shown for Video appointments only, and only when more than one provider is configured.
- Requirement — Mandatory (patients on the linked resources are automatically enrolled) or Optional (patients choose whether to register). Optional appointments add two fields: Maximum available slots (1–400, or leave blank for no limit) and Booking closes.
- Available tags — organisation tags used to categorise appointments can be selected here if this tool is activated for your organisation.
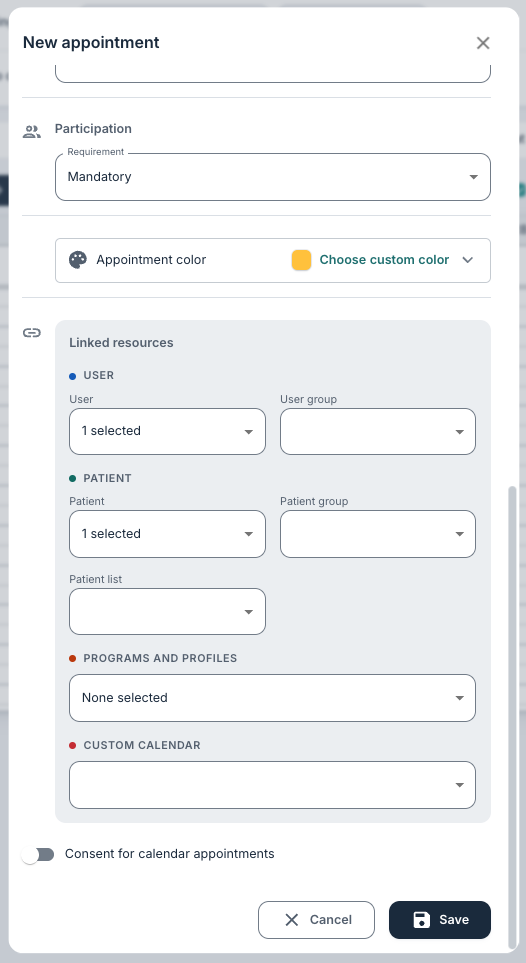
- Appointment colour — a custom colour in the patient's calendar. Default is yellow for mandatory and grey for optional appointments; changing this colour affects the patient's view.
- Linked resources — the audience for the appointment: therapists, user groups, patients, patient groups, patient lists, programmes, programme profiles and custom calendars. If you had already activated different resources via + Add calendar, you will notice that these are pre-selected here. Multiple resources can be selected (see Choosing the audience: linked resources).
Note that the responsible clinician (user) is always required, including on optional appointments, so every appointment has at least one owner.
Consent for the appointment
If the appointment requires the patient to consent before participating, you can enable the Consent switch, enter the desired text, and add any custom questions.
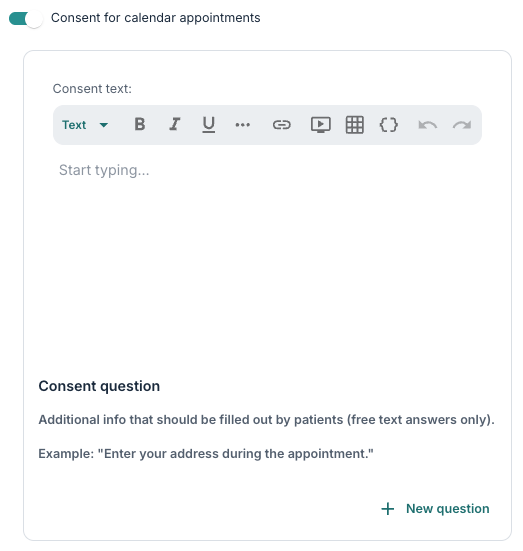
If you add any required questions, these must be answered before the patient can register or join. Consent is stored per patient and per appointment and is visible from the appointment's Details panel (see Consent for appointments).
Saving the appointment
Once you have filled out the appointment form, you may Save. The appointment immediately appears on the calendars of every linked resource. Patients on those resources will then receive a notification about the new appointment if calendar-event notifications are enabled for the organisation.
Creating appointments from the Calendar view
Creating individual appointments for patients works very similarly to creating appointments from the main calendar view. You can navigate to the patient where you want to create an appointment, then select the Calendar tab found under Overview.
In this form, you can simply input the appointment name, date and time, description, type and requirement. You can select the colour and activate consent if needed. The linked resources section present in the main Calendar view is excluded from this view as you are explicitly applying this appointment directly to the individual patient.
Editing an appointment
If you have already created an appointment and wish to amend it, you can open the appointment from the calendar and select Edit in the popover.

All fields can be changed except Type. For a recurring appointment, changes can be applied to this appointment, this and all following, or the whole series.
Removing a patient without cancelling for everyone
To remove one patient while keeping the appointment for the rest of the audience, select the edit button as described above. You will then find an Excluded participants section.
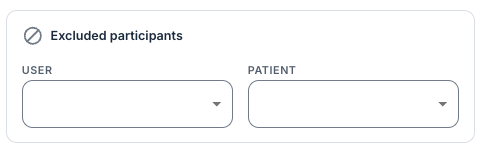
You can use the dropdowns under User and Patient to select participants to exclude. Once you Save the changes, the appointment will then disappear from that patient's calendar but remains for every other linked resource. Note that excluded participants affect only the specific appointment in question, meaning the person stays in the underlying group, list or programme.
Deleting an appointment
Using the three dots on an appointment, you will find the options to Remove from calendar or Delete from all calendars.
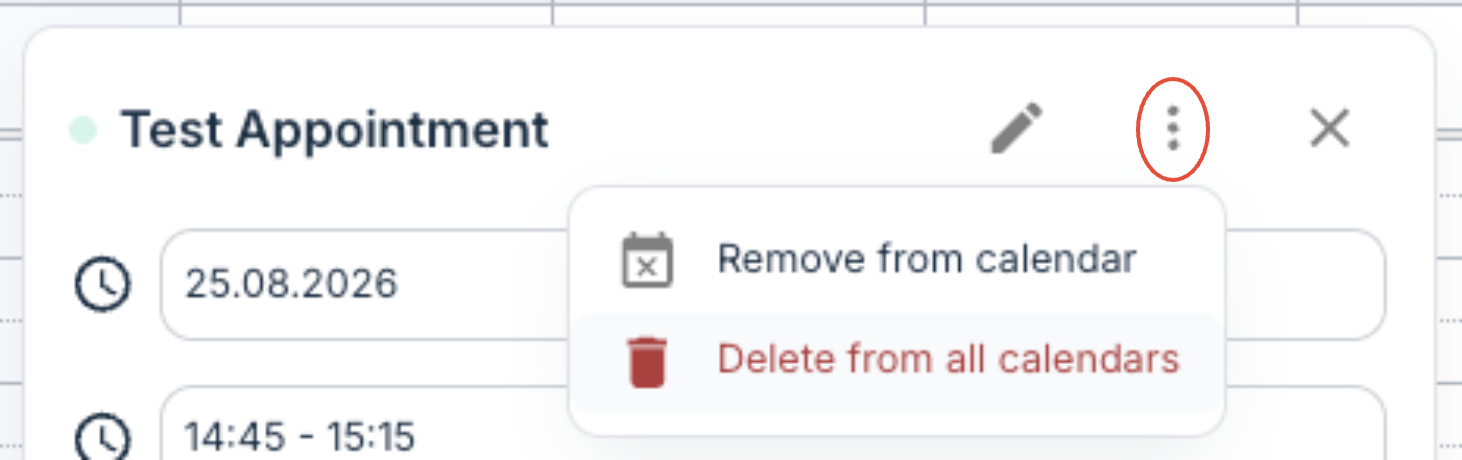
Delete from all calendars will remove the appointment for every participant. Remove from calendar will hide the appointment from the activated resources' calendars, but it will then remain available for all other participants.
Was this article helpful?
That’s Great!
Thank you for your feedback
Sorry! We couldn't be helpful
Thank you for your feedback
Feedback sent
We appreciate your effort and will try to fix the article