The Registration Diary is a tool that can be added to a programme to give patients a structured way to log data repeatedly over time, for example, to track training sessions, symptoms, or other health-related measurements. It is designed for situations where patients need to register the same type of information regularly (daily or weekly) and where both the patient and clinician benefit from seeing that data visualised as a progression over time.
This article describes how to configure the Registration Diary in programme settings, what patients see in the patient app, and how to navigate and view registrations on the patient page.
CONTENTS
Overview
The Registration Diary is configured per programme, and can be activated under Setup > Program Features. Once activated, it can be configured under the Registration Diary tab. Once enabled, it appears as a dedicated tool in the patient's menu in the app.
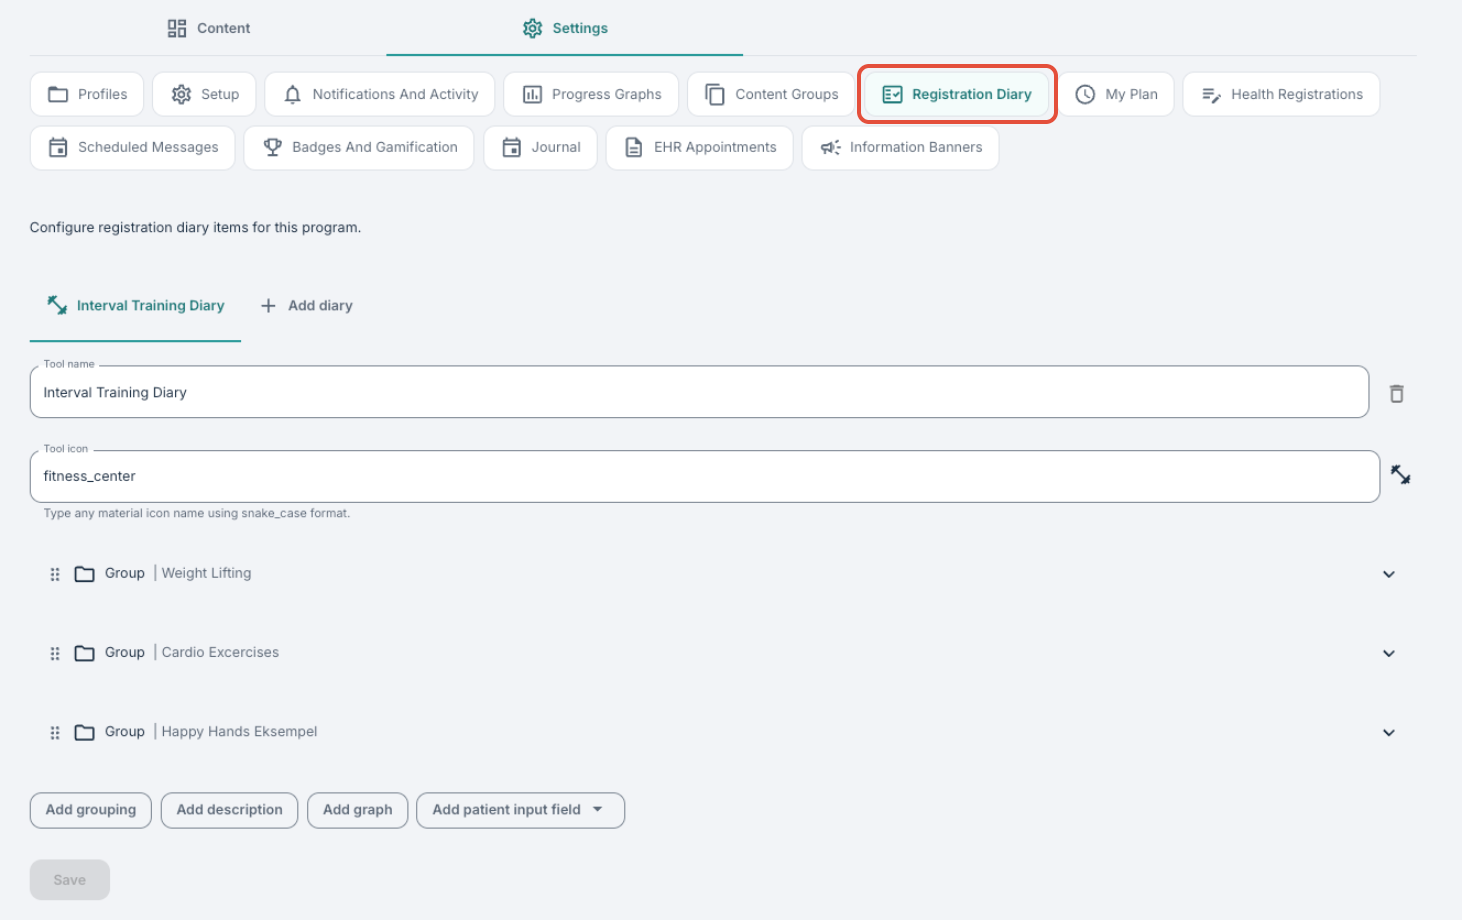
Each programme can contain one or more registration diaries, and you can use the + Add diary to create a separate page. This can be useful if you want to separate or distinguish one registration page from another and ensure that they display as separate tabs in the patient app hamburger menu.

Each page or registration diary can contain multiple groups, each with its own combination of descriptions, input fields, and graphs.
A typical use case is a training diary where a patient registers interval training data (speed, heart rate, intensity) for each session, and the progress is automatically visualised in a connected graph.
Setting up the Registration Diary
When first setting up a new registration diary, you can give the tool a name and choose an icon. The tool name will be visible to the patient in their menu, and the icon will be displayed next to the tool name. To select an icon use snake_case format e.g. bedtime, home, fingerprint, badge, restaurant, fitness_center etc.
Groups
The diary can be built around groups if desired. Each group can have a title and a description, and contains one or more elements (descriptions, input fields, and graphs). Groups allow you to organise registrations by category, for example, separate groups for different types of training (running, strength, intervals) within the same diary. If using groups, when navigating to the tool in the patient app, a patient will select what they want to log before going into the specific logging page:
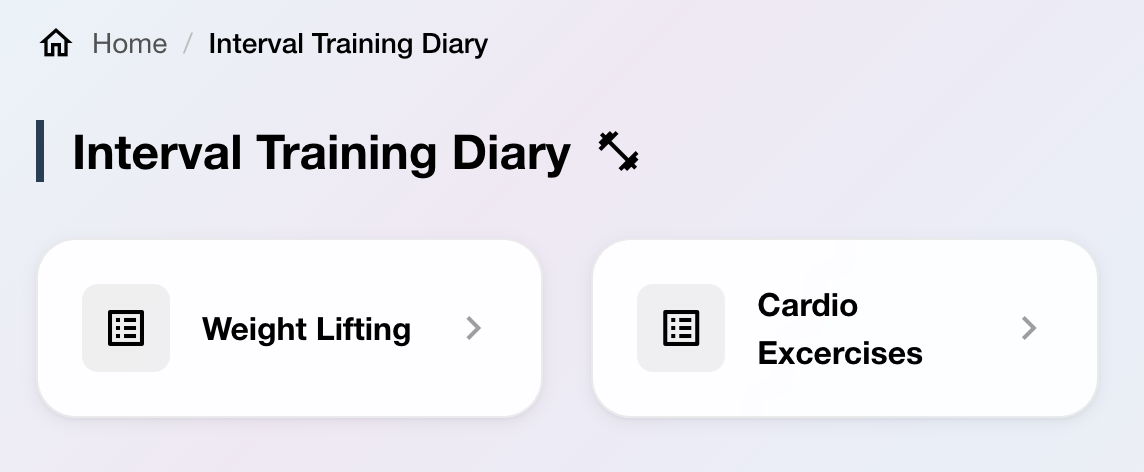
To add a new group, you can select Add grouping. You can add multiple groups, and they will each appear as a separate card on the overview page that patients see when they open the diary.
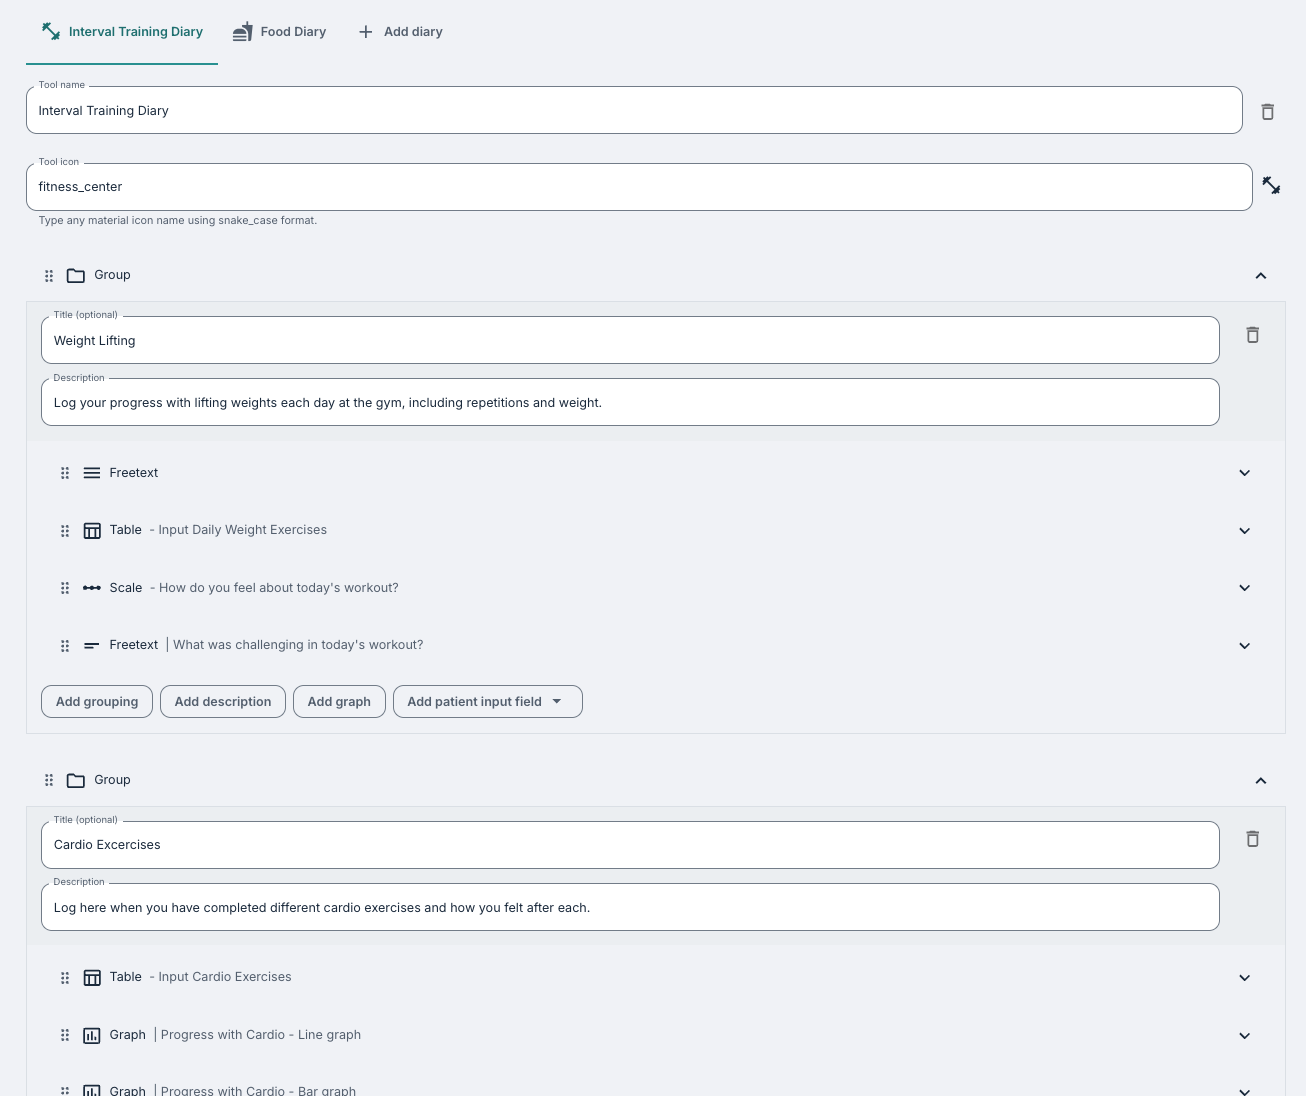
Note if you are just wanting to collect one set of registrations, you do not need to add a grouping and can hop over this step. You can use the dots next to each group to move and rearrange their order. The same also applies to elements within groups.
Adding elements
Within each group, you can add four types of elements using the buttons at the bottom of the group:
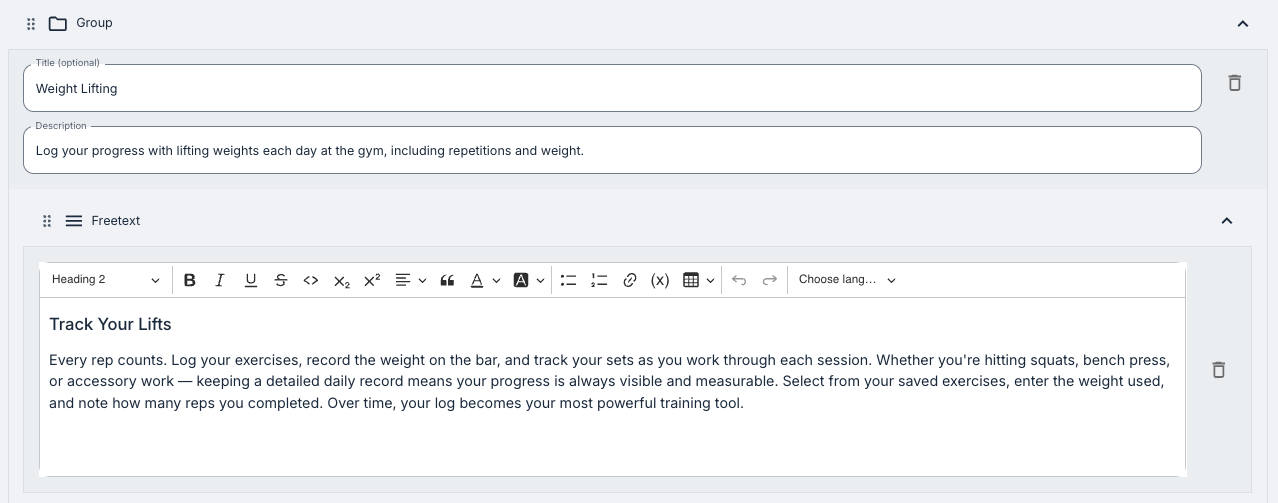
Add description
You can use this to add explanatory text, instructions, or context for the patient. This is a freetext display element, rather than an input field, so the patient reads it but does not fill it in. It supports rich text formatting.
Add patient input field: Table
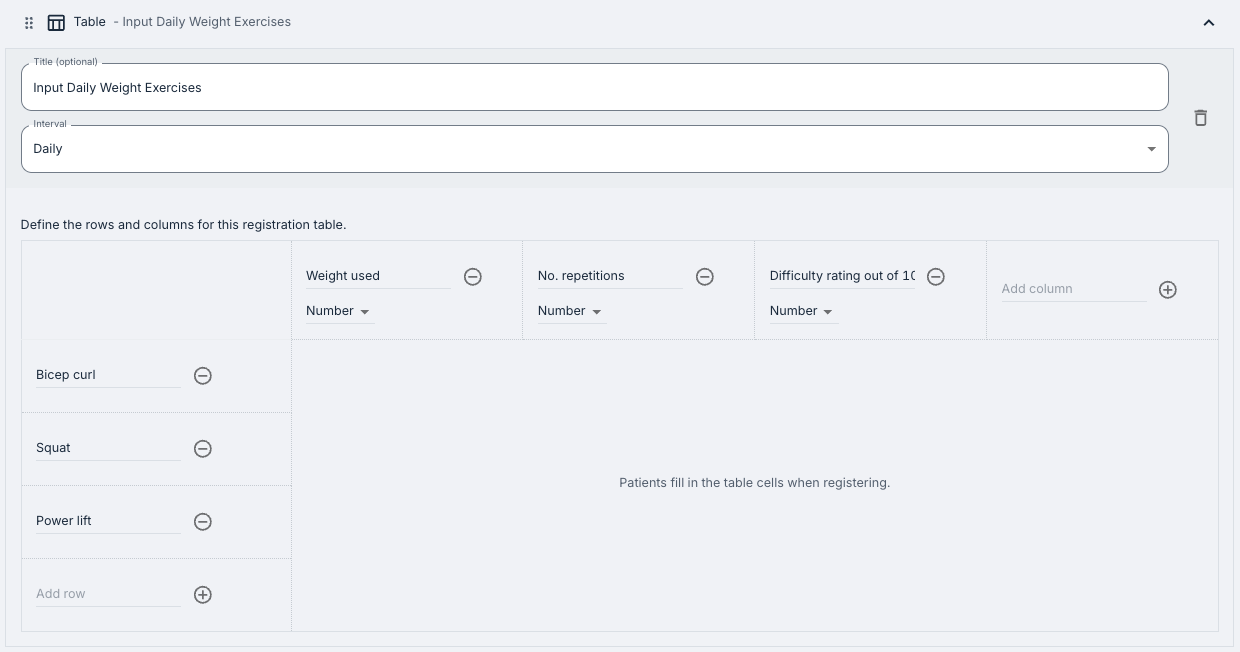
A table allows the patient to register values in a structured grid. You define the columns (e.g. Interval, Speed, Heart rate, Intensity) and rows (e.g. Interval 1, Interval 2, Interval 3). Each column can be set to accept either text or numeric input.
You also set the registration Interval for each table: Daily or Weekly. This determines how often the patient is expected to fill in the table and how the date navigation is displayed to them.
Add patient input field: Scale
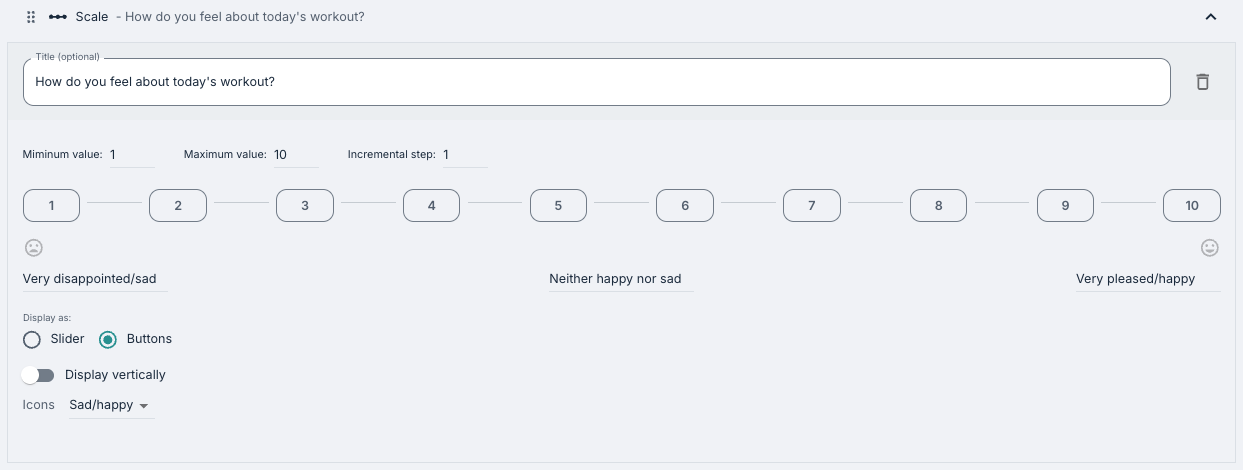
A scale lets the patient register a numeric value by sliding along a range. This works very similarly to the standard Scale question type which you may have in questionnaires or content pages in your programme. You may configure a minimum value, maximum value, incremental step, and optional labels for the minimum, midpoint, and maximum. A title for the scale is required.
Add patient input field: Freetext
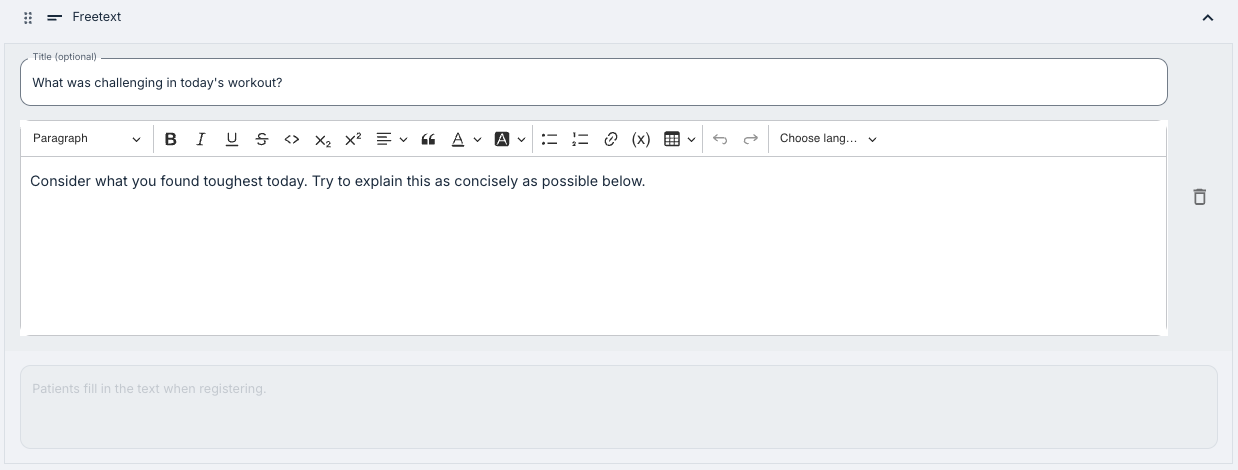
A freetext input field allows the patient to write a free-form response to a question or prompt. You provide the question text, and the patient types their answer. This is different from the Add description element, as here, the patient actively fills in the field.
Add graph
A graph visualises data from one of the input fields in the same group. When adding a graph you can configure:
- Title: The name shown above the graph.
- Graph type: Line or Bar.
- Time period: For example, last 7 days, last 30 days, or a custom number of days.
- Source: Which input field's data to display. This links the graph to a specific Table or Scale in the same group.
- Series: You define one or more data series, each mapped to a specific column from the selected source. For each series you set a display name and a colour. For tables, you can add multiple series to show different columns on the same graph. It is also possible to include an average series alongside individual data points.
You can add multiple graphs within the same group, for example to show different aspects of the same registration data separately. You may choose to have a line graph for one kind of registration, and a bar graph for another.
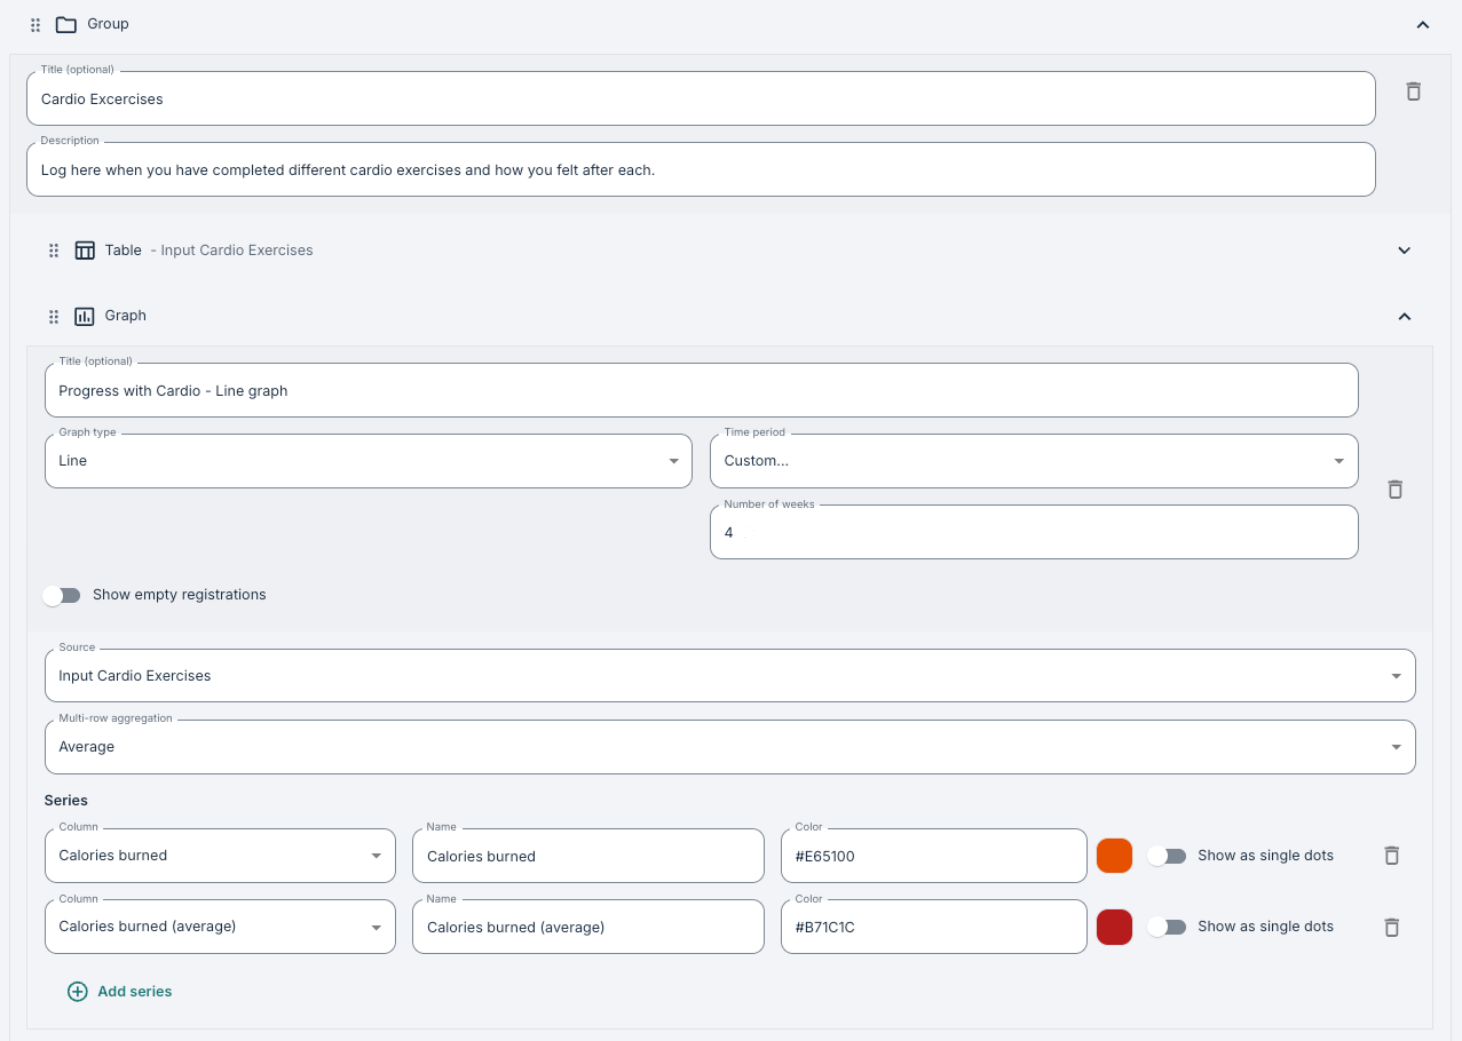
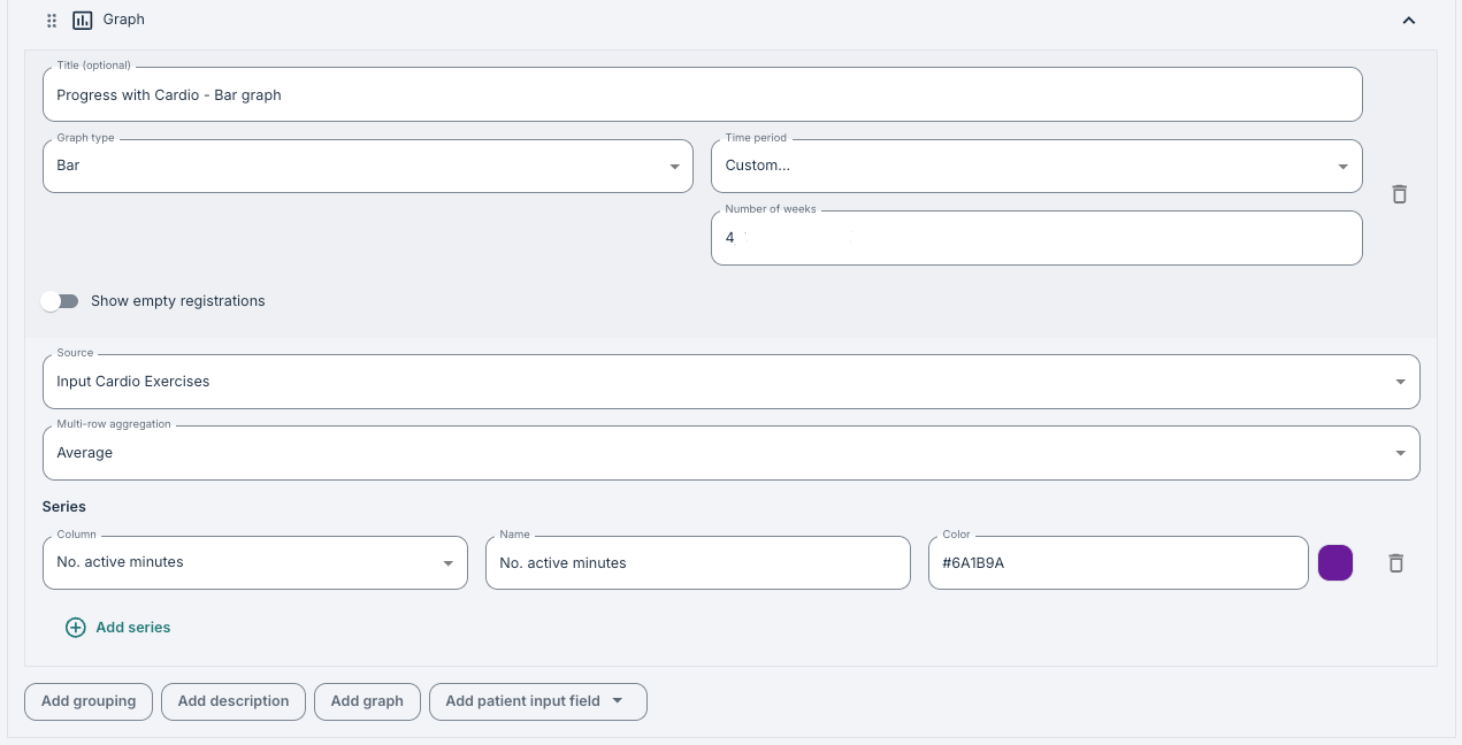
For line graphs, you will have an additional option to activate the Show as single dots toggle if you would prefer the graph to display individual points as opposed to connecting lines.
Registration frequency
Each table and scale input field has its own frequency setting (daily or weekly). This controls how the patient navigates the diary; either by day for daily elements, or by week for weekly elements. The date selector at the top of each element will reflect the correct period accordingly.
Patient view
Overview page
When the patient opens the Registration Diary from their menu, they first see an overview page listing all the groups configured in the diary. Each group is shown as a card with its title, description, and a summary of the input fields it contains. The patient clicks on a group card to open it.
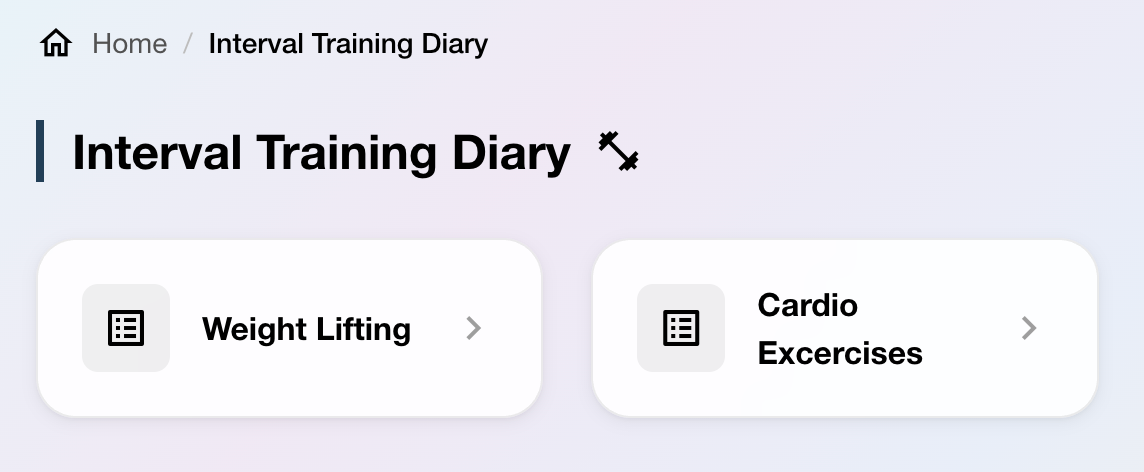
If no groups are configured, the patient will navigate directly to the page where they can record their registrations for the day/week.
Registering data
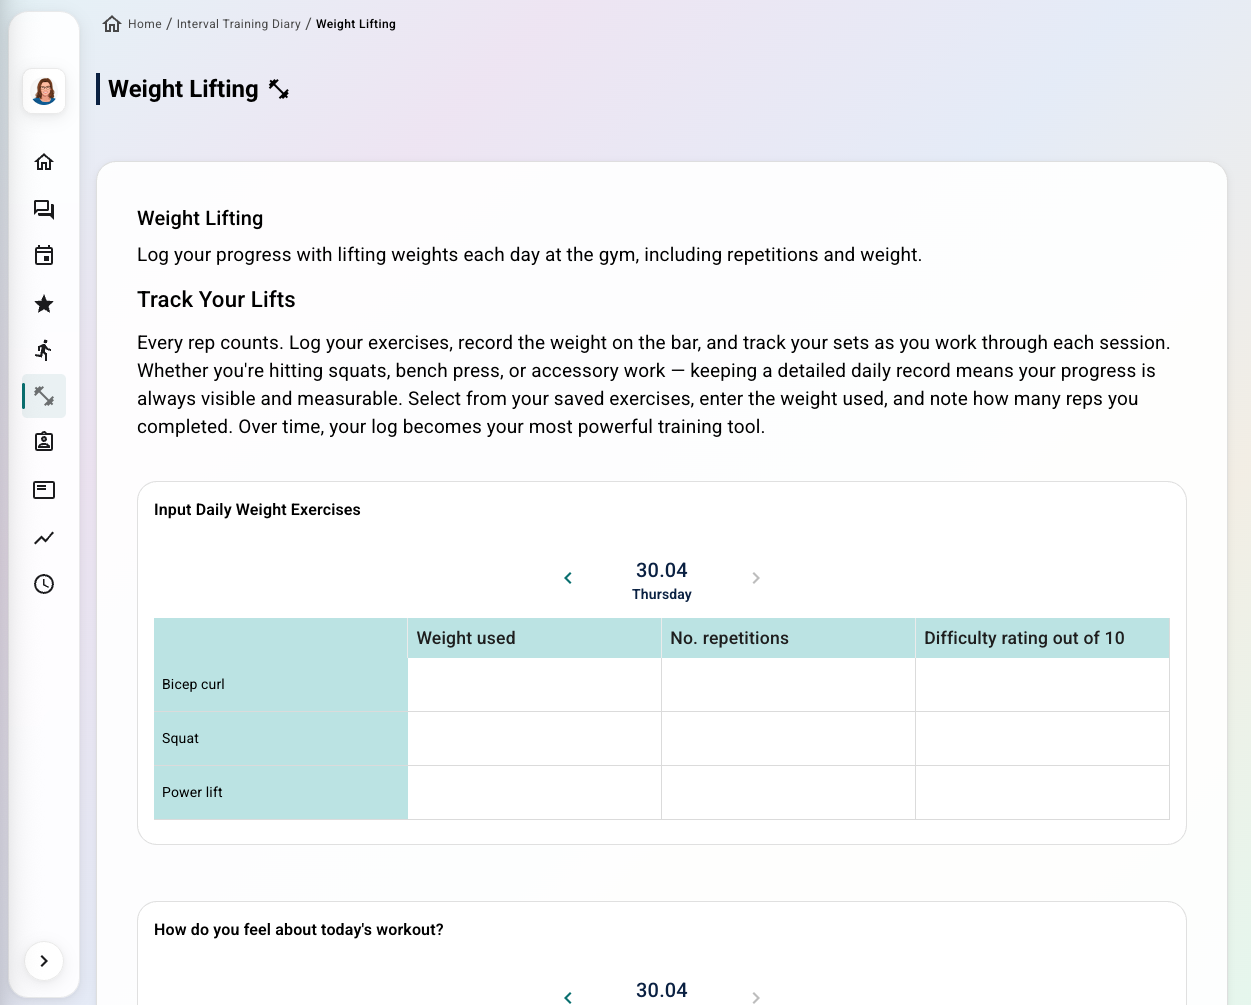
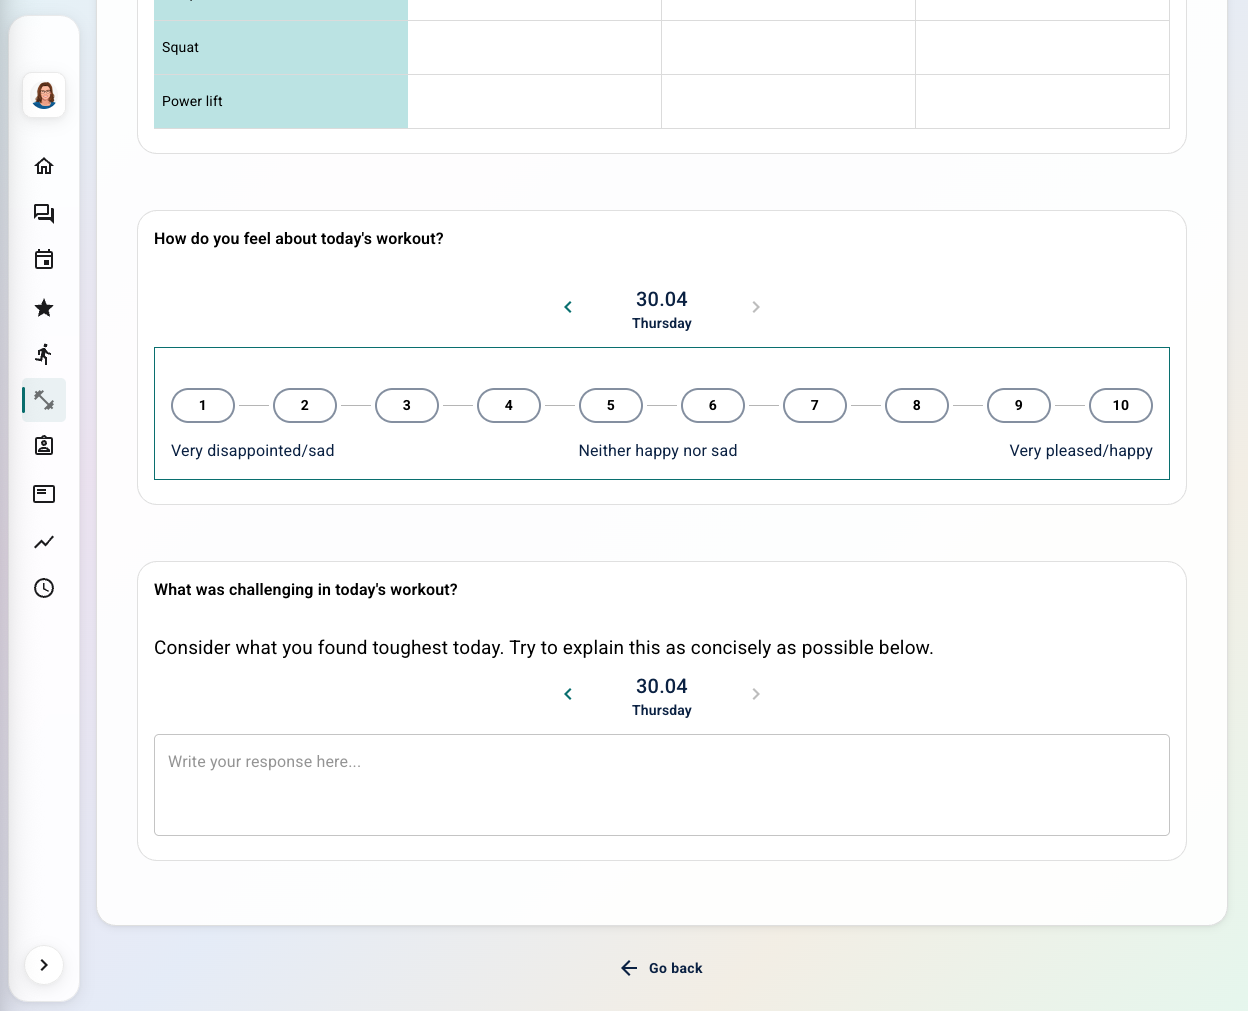
Inside a group, the patient sees each element in the order defined in the programme settings. Input fields show the current day (or current week) by default, and the patient can fill in values directly.
For a table, the patient types values into the cells for each row and column. For a scale, the patient drags the slider or clicks a point along the range to set their value. For a freetext input field, the patient types their response in the text area.
Navigating between days and weeks
Each input field has navigation arrows to move backward or forward in time. Daily fields navigate day by day; weekly fields navigate week by week. Only one date selector is shown per group (not per individual element), keeping the interface clean when multiple inputs share the same frequency.
The patient can go back to review or edit previous registrations, and graphs will update to reflect any changes.
Viewing graphs
If graphs have been configured for a group, they appear below the input fields. The patient can see their progression over time directly within the diary. Graphs update automatically when new data is registered. The legend below each graph indicates which series is which.
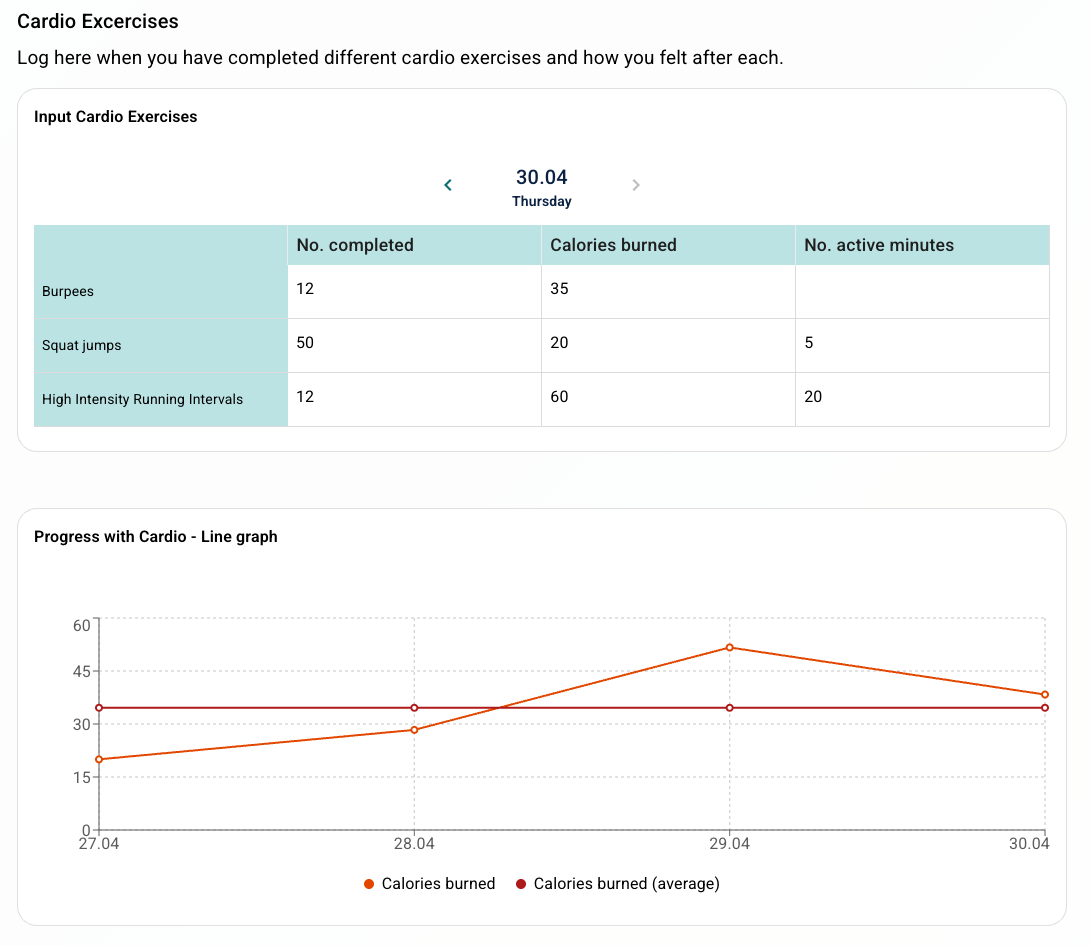
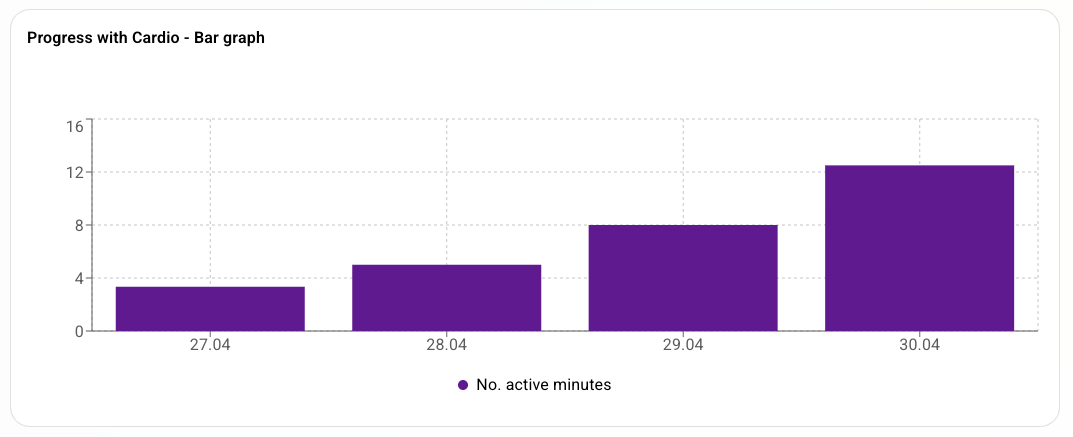
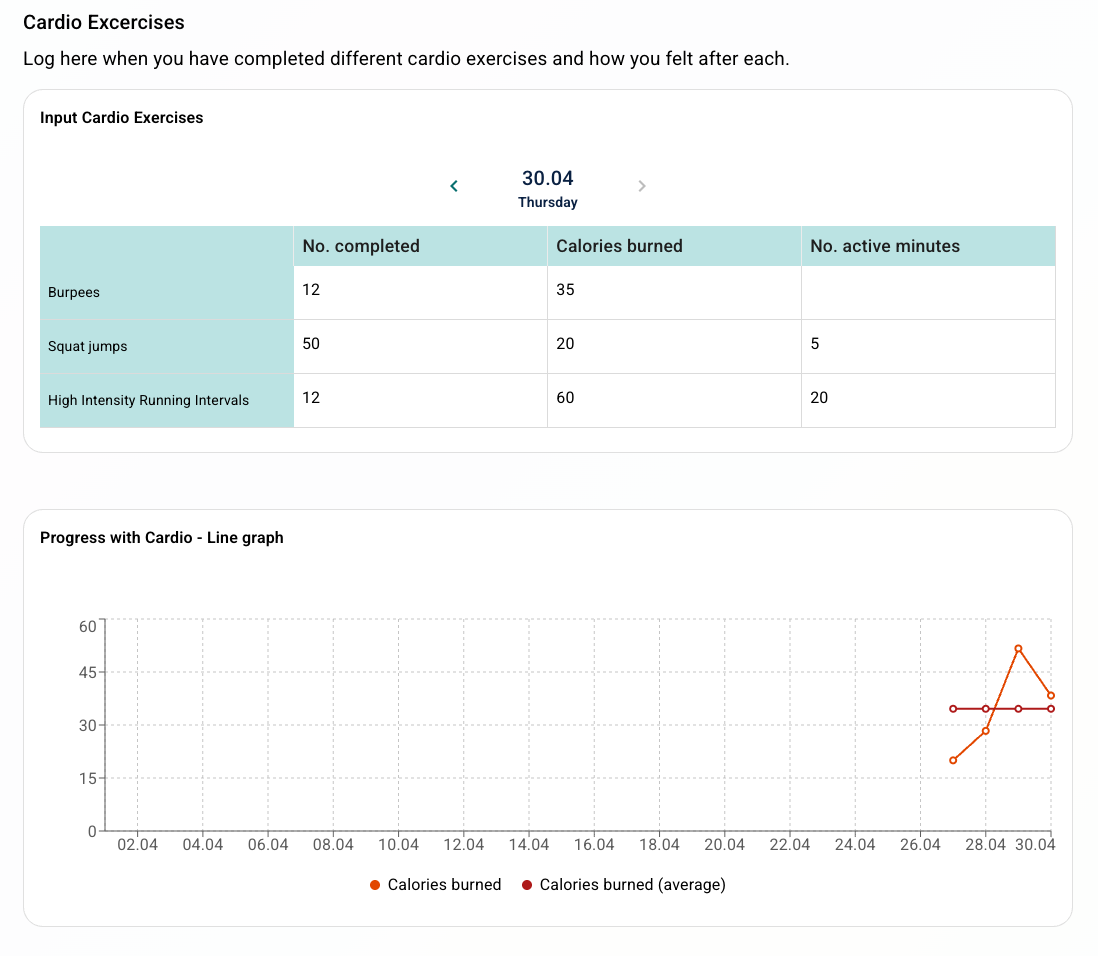
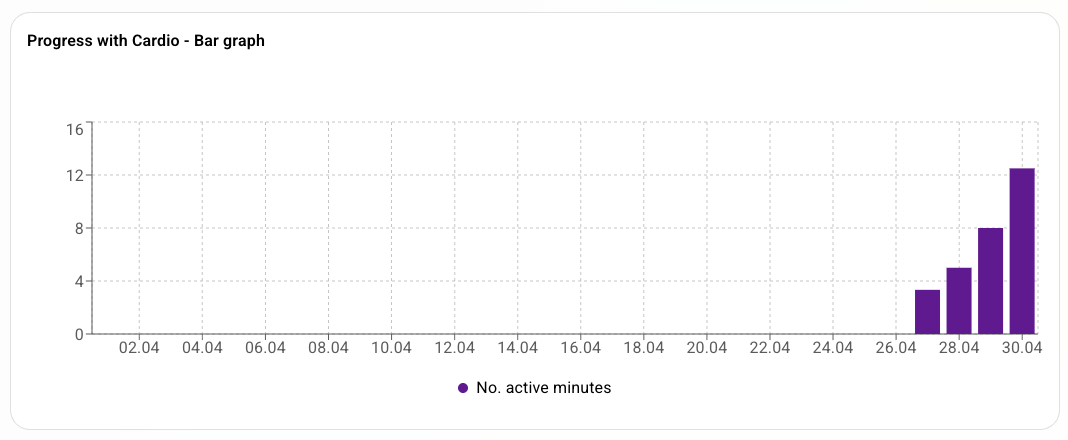
If the Show empty registrations toggle has been activated in the setup, data points for days or weeks where no value was registered (displayed as empty points rather than gaps in the line) will be included.
Therapist / clinician view
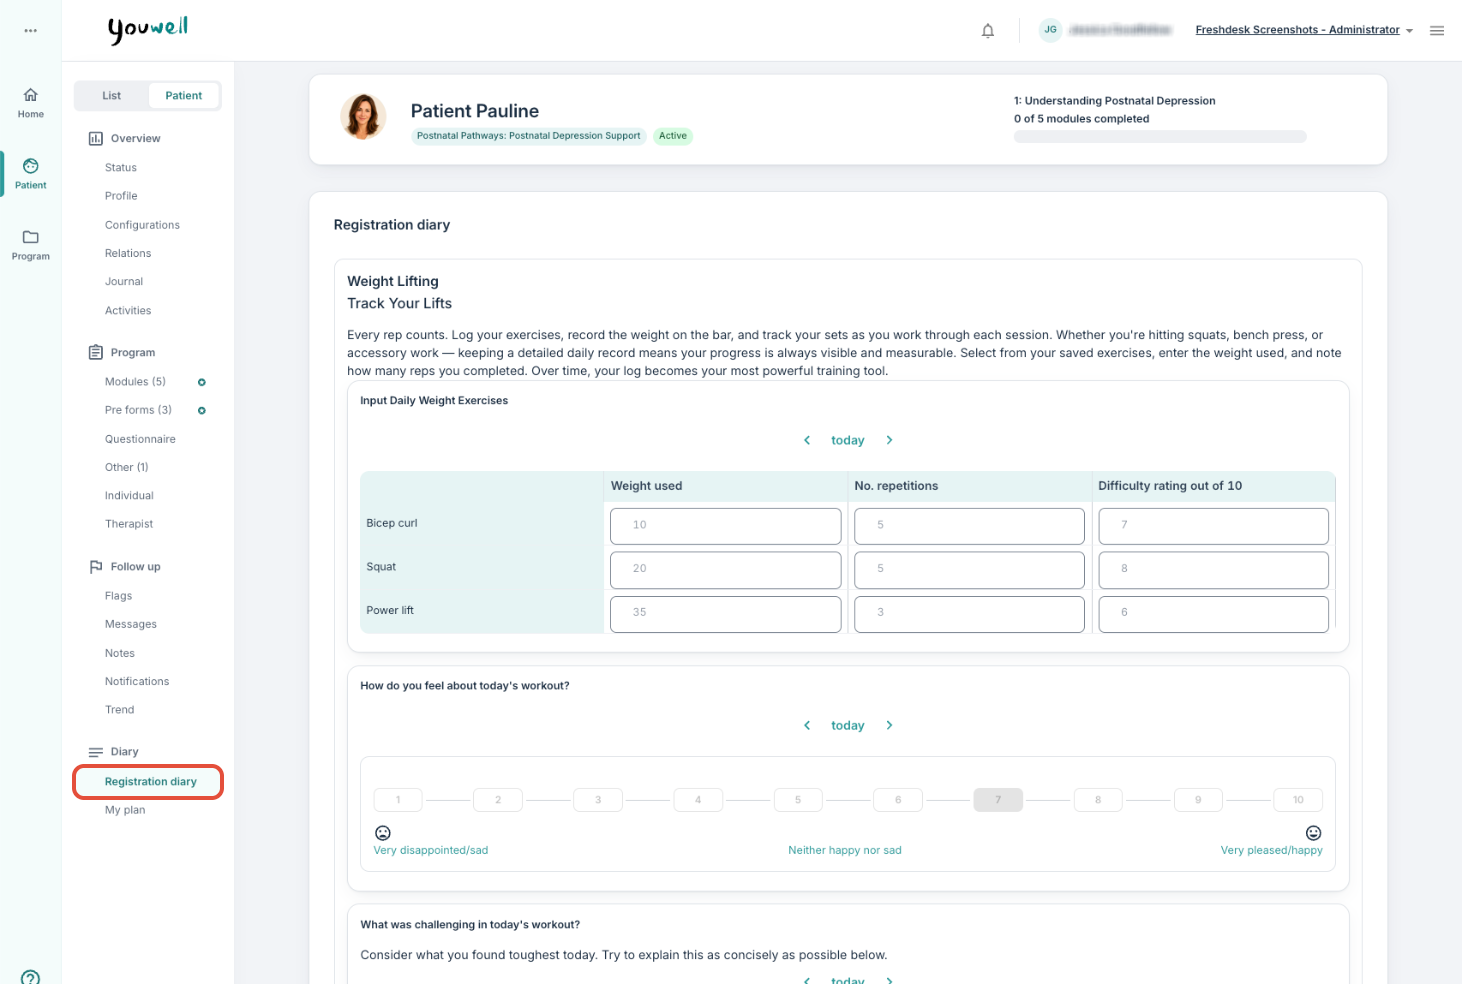
Clinicians can view a patient's Registration Diary data from the patient page in the portal. They can navigate to the patient page and select Registration diary from the left-hand menu under Diary. The layout is similar to the patient view, meaning the clinician can see the same input fields and graphs, and can navigate between days and weeks using the same date selectors. This makes it straightforward to review a patient's registrations during follow-up.
Data export
It is also possible to download a data export of the inputs within a registration diary. You will find the export under Registrations and Registration Diary.
Was this article helpful?
That’s Great!
Thank you for your feedback
Sorry! We couldn't be helpful
Thank you for your feedback
Feedback sent
We appreciate your effort and will try to fix the article