CONTENTS
- Switching views
- Add to calendar
- How appointments are colour-coded
- Mandatory and optional appointments at a glance
- Opening an appointment
- Drag-and-drop rescheduling
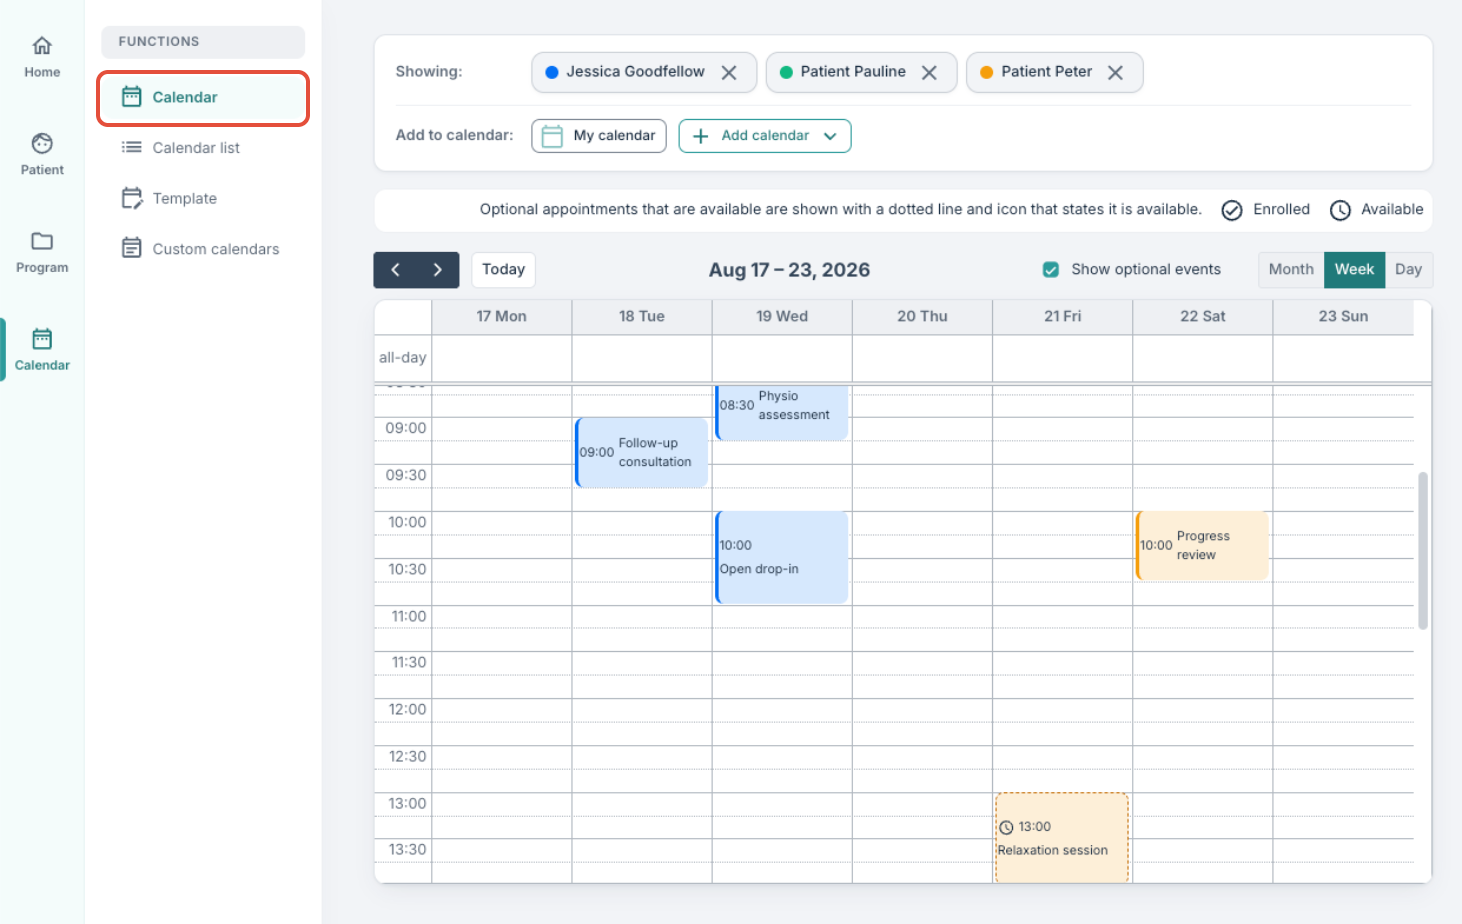
The calendar view opens on the current week and shows every appointment linked to you and a calendar you have added. The view can be switched, filtered, and used to open, create or reschedule appointments.
Switching views
Three views are available from the top-right of the calendar:
- Month — a monthly overview of appointment counts and titles.
- Week — the default. A Monday–Sunday grid with time slots from 06:00 to 22:00, scrolled to 08:00 on open.
- Day — a single-day time grid.

Use Today, Previous and Next to move between periods.
Appointments in the week view are ordered by start time so each day reads in sequence. When two appointments overlap, both are shown and their titles stay readable. An appointment is displayed for the duration you set, so a 15-minute appointment appears as 15 minutes.
Add to calendar
At the top of the view, Showing lists the calendars currently shown, each as a chip in its own colour, and Add to calendar has the buttons that add more. Two calendars are your own, and both are shown when you open the Calendar:
- My calendar — appointments you take part in yourself: directly, through one of your user groups, or through a custom calendar you belong to. Its chip shows your name.
- My participants — appointments with the patients you are a therapist for (directly or through one of your user groups), also when you are not on the appointment yourself. Appointments for a whole group or programme are not included.
Hover over the My calendar or My participants button to see what it includes. If you do not want to see your patients' appointments, remove the My participants chip. The Calendar remembers this choice for you, on every device, and the My calendar tile on your dashboard follows it. Select My participants under Add to calendar to bring it back.
 To bring in other calendars, for example, a therapist group's schedule, another therapist's calendar, a programme, or a custom calendar, select Add calendar and pick the resource from the search dialog.
The calendars you add stay in the view, so they are still there after you log in again or reload the page, for example a custom calendar you follow regularly. Remove a calendar's chip to take it out of the view.
External therapists can open the Calendar and see their own appointments and those of the patients they are connected to. They cannot see the calendars of other therapists.

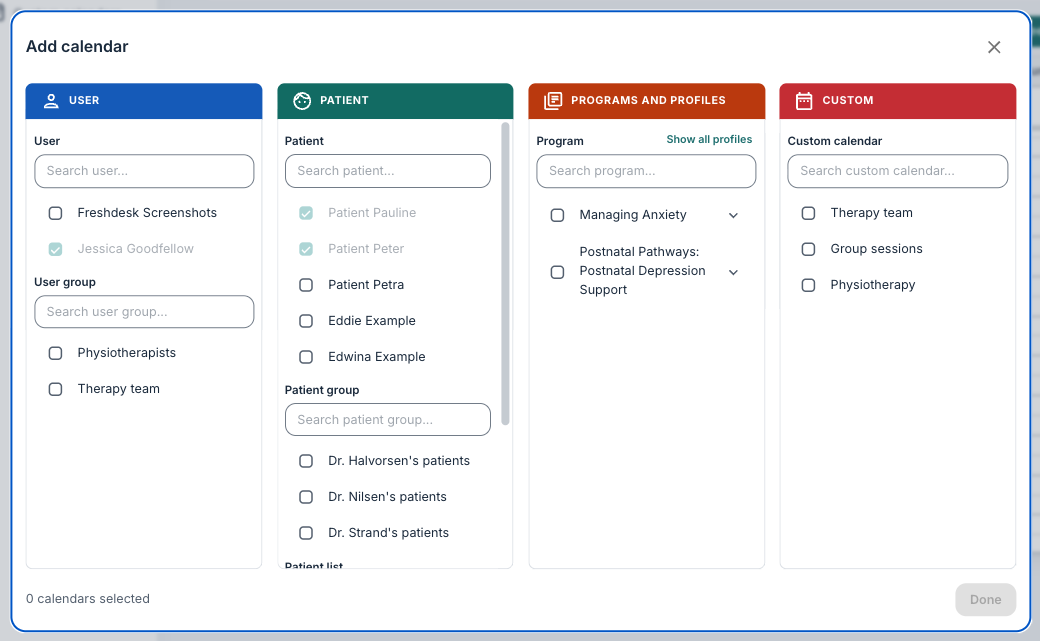
Turning a calendar off simply hides its appointments from your view; it does not delete anything, and the appointments remain visible to everyone they apply to.
Each linked calendar is given its own colour so the origin of an appointment is visible at a glance. Your own calendar uses the Youwell blue, and My participants has a colour of its own. To remove a calendar from view, remove its chip from the panel.

How appointments are colour-coded
When viewing an individual patient's calendar (under Calendar in their patient profile), you will see that the appointment takes its its colour from the calendar it is associated with, so appointments from the same calendar share a colour and are easy to group by eye.
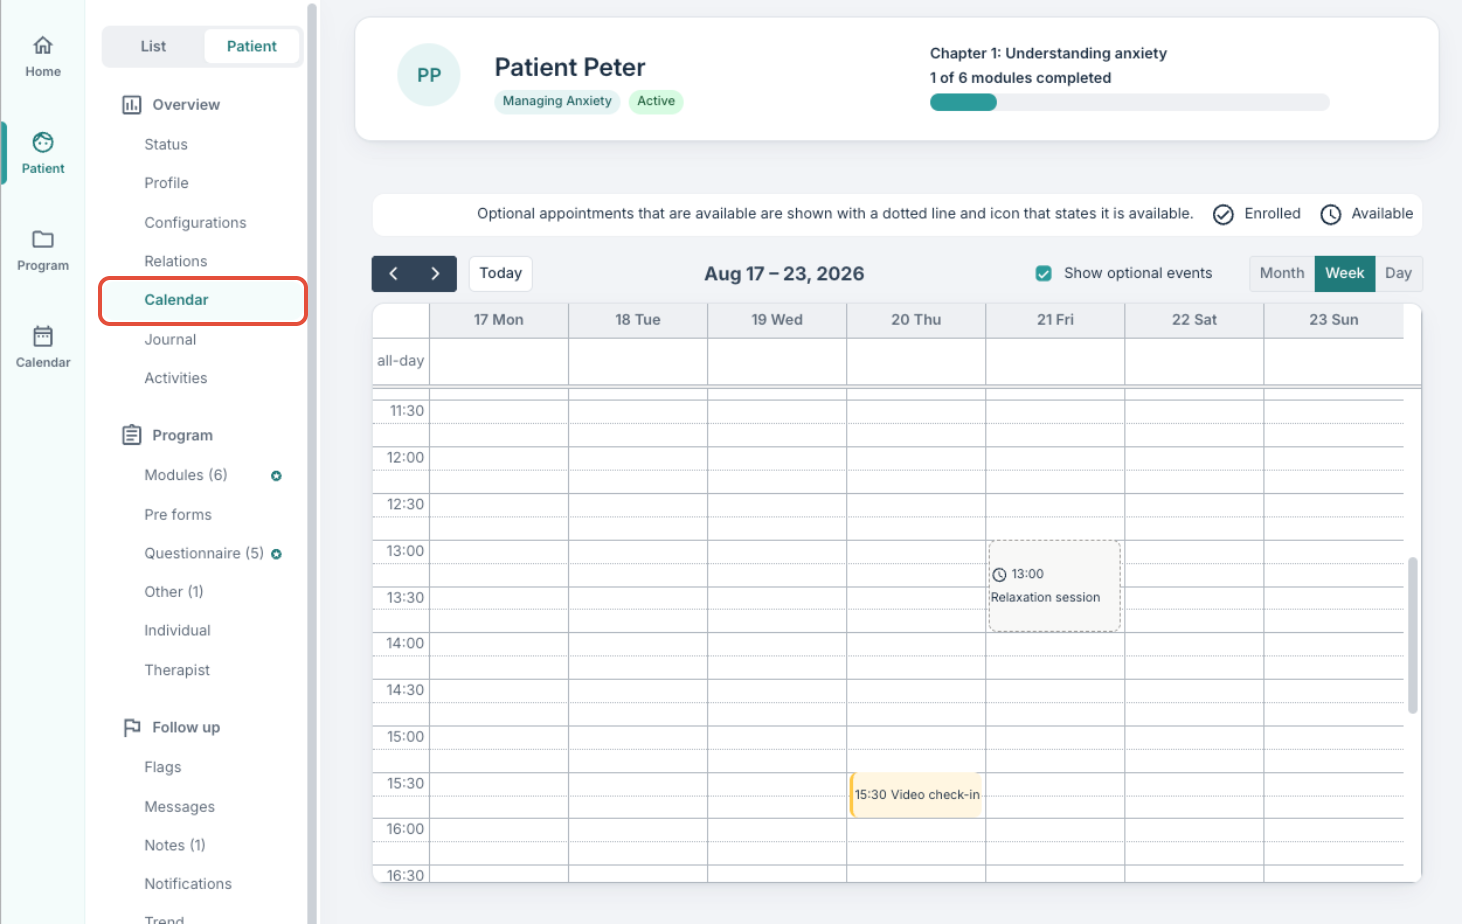
The colours a patient sees in the app match the colours on the patient's calendar in the portal, so the same appointment is recognisable in both places.
Mandatory and optional appointments at a glance
Appointments are shown in different styles depending on their requirement:
- Mandatory appointments appear in the appointment's calendar colour with a solid border. Patients are automatically enrolled and cannot cancel from the patient app.
- Optional appointments appear with a dashed border in a muted grey to patients who have not yet registered. Once a patient registers, the appointment moves to the calendar's colour for that patient.
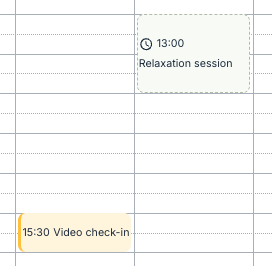 View from Calendar on the patient profile page, where you can see the appointment's selected colour, which will be reflected for the patient in the patient app. | 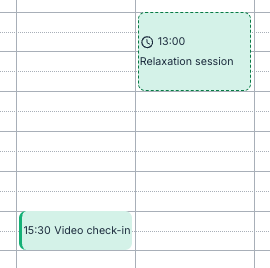 View from Calendar in the Calendar section, where the display categorises the appointments based on colours selected in the Showing section. |
The clock icon also distinguishes mandatory, available (open slots) and enrolled (booked) states. Use the Show optional events toggle to hide optional appointments a patient has not registered for.

Opening an appointment
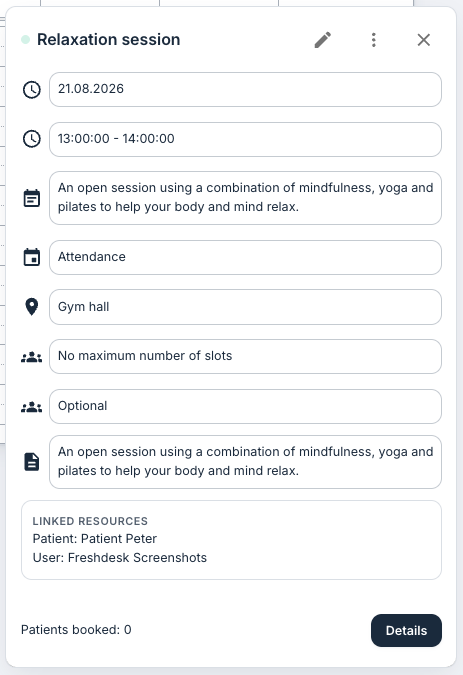
Select an appointment to open its detail popover, which shows the title, date and time, description, type, linked resources and, for optional appointments, the current registration count and maximum slots. From the popover you can edit the appointment (if you have edit access), copy the video meeting link, start or join a video call, and open the Details panel to view registered patients.
Drag-and-drop rescheduling
An appointment can be dragged to a new time slot. On drop, a confirmation dialog opens so a mistaken drag does not silently move the appointment. If the appointment is part of a recurring series, an additional prompt asks whether to change this appointment, this and all following, or the whole series.
Was this article helpful?
That’s Great!
Thank you for your feedback
Sorry! We couldn't be helpful
Thank you for your feedback
Feedback sent
We appreciate your effort and will try to fix the article